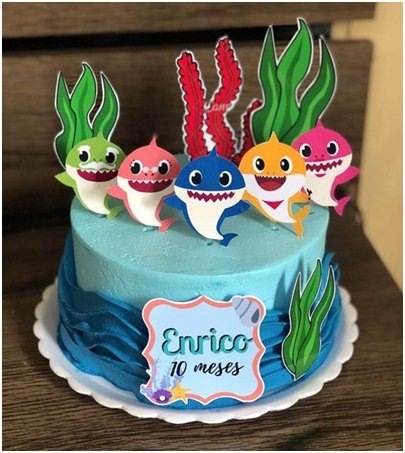
Kids are fascinated by Baby Shark! It’s not just the melody but all the cute characters and evolving storyline. Now you can sing and bake along, making your own Baby Shark cake!
There are many different ways of bringing the adorable sharks to life. Regardless if you want to serve it at your kid’s birthday party or any other celebration, there is a Baby Shark Cake for every occasion. You can start with basic designs and challenge yourself by incorporating details, colors, and sea elements.
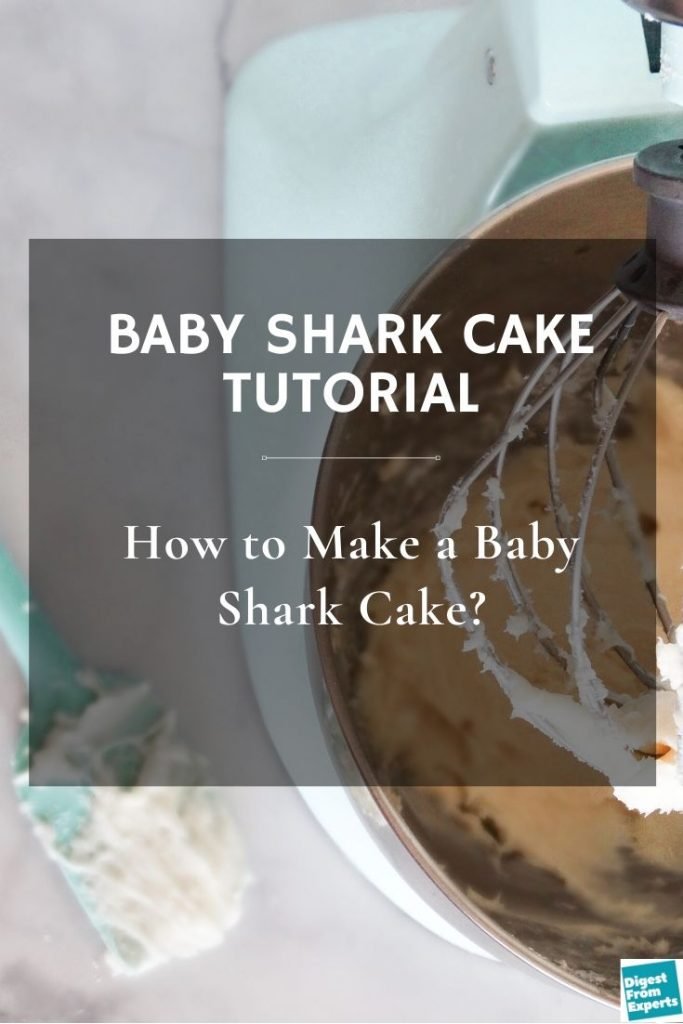
This tutorial equips you with all the necessary knowledge to make a stylish baby shark cake, step by step. Let’s go bake, doo doo doo!
The Basics of a Baby Shark Decorated Cake:
The basic structure of any decorated cake includes some key elements. They are essential to creating the shape and make sure the cake will not fall apart. Higher the cake, the stronger the structure needs to be. These elements are:
- The cake layers. They can be vanilla flavored, chocolate ones or colored with edible food coloring. These layers need to be strong enough to sustain the cake.
- The fillings. For cakes, there are numerous possible options for fillings. However, talking about decorated cakes you might want to choose buttercream or ganache. They are sticky enough to “glue” the cake layers together.
- The outside. The exposed part of the cake is the most important in terms of style. You might choose to decorate the outside with chantilly, buttercream or moldable fondant. For this article, buttercream is the choice.
- The structure holders. In some small cakes, you won’t need to use elements to hold the structure. However, as the layers go higher, it’s required to add skewers or special cake support.
- The decorative bits. The small details are the ones to bring your cake to life. Depending on the design you choose, they can be fondant sharks, seaweed, colored buttercream or even printed paper sharks. These details generally take some time to create.
Making the layers of the Baby shark cake – Base Cake Recipes
Before choosing the cake design, it’s important to have good cake recipes in hand. The cake layers work like bricks of the structure and give the deliciousness to this sweet treat.
The Baby Shark song will get stuck inside your head but the cake can’t get stuck in the baking pan! So remember to grease baking pans and to preheat the oven at least 10 to 15 minutes before baking. These details are extremely important to have a perfectly textured cake. Additionally, never handle a warm cake, as it’s more sensible and breaks easily. Some basic recipes you can use:
Vanilla Cake:
Ingredients:
- 1 ½ cups unsalted butter
- 3 ¾ cups all-purpose flour
- 1 tsp. baking powder
- 1 tsp. baking soda
- Pinch of salt
- 2 ¼ cups of sugar
- 3 eggs
- 4 ½ egg yolks
- 3 tsp. vanilla extract
- 1 ½ cup buttermilk (low-fat)
Directions:
- Preheat the oven to 180ºC (350F). Grease three cake pans with butter or vegetable oil. The cake pans must be medium, around 8-by-2 inches. You can adapt to other sizes of cake pan depending on the final design.
- Sift flour, baking powder, baking soda, and salt together. Set aside.
- In another bowl (it must be large) combine sugar and butter, mixing until fluffy. Using a stand mixer gives you a better texture but you can use a whisk as well.
- Slowly add in eggs and yolks, until completely incorporated. Followed by the vanilla extract.
- When all is homogenous, add in the sifted flour and buttermilk. Alternate them, to make sure all is incorporated without crumbles.
- Pour the cake batter into the cake pans, dividing it. Bake for about 30-35 minutes. The time might vary, check it with a toothpick and be careful to don’t let it burn.
Chocolate Cake:
Ingredients:
- 1 ½ cups cocoa powder (no sugar added)
- Pinch of salt
- 3 cups all-purpose flour
- 1 tbsp. baking soda
- ¾ cup sunflower oil (or other neutral vegetable oil)
- 1 ½ cup buttermilk
- 3 cups sugar
- 3 tsp. vanilla extract
- 2 tsp. baking powder
- 3 eggs
- 1 ½ cups water (warm)
Directions:
- Preheat the oven to 180ºC (350F). Grease two cake pans with butter or vegetable oil. The cake pans must be medium, around 8-by-2 inches. You can adapt to other sizes of cake pan depending on the final design.
- Sift cocoa, salt, flour, baking soda, sugar, and baking powder together.
- Add in sunflower oil, buttermilk, vanilla, eggs, and water. Don’t add them all at a time, incorporate slowly, mixing well.
- Divide cake batter between the cake pans. Bake for around 40-50 minutes. You can divide into more cake pans according to your needs.
- Insert a toothpick to be sure the cake is completely baked. A toothpick inserted in the middle of the cake must come out clean. Wait for the cake to cool down before assembling.
Rainbow Cake:
Ingredients:
- 1 ½ cups unsalted butter
- 3 ¾ cups all-purpose flour
- 1 tsp. baking powder
- 1 tsp. baking soda
- Pinch of salt
- 2 ¼ cups of sugar
- 3 eggs
- 4 ½ egg yolks
- 2 tsp. vanilla extract
- 1 ½ cup buttermilk (low-fat)
- ¾ cup rainbow sprinkles (suitable for baking)
Directions:
- Preheat the oven to 180ºC (350F). Grease three cake pans with butter or vegetable oil. The cake pans must be medium, around 8-by-2 inches. You can adapt to other sizes of cake pan depending on the final design.
- Sift flour, baking powder, baking soda, and salt together. Set aside.
- In another bowl (it must be large) combine sugar and butter, mixing until fluffy. Using a stand mixer gives you a better texture but you can use a whisk as well.
- Slowly add in eggs and yolks, until completely incorporated. Followed by the vanilla extract.
- When all is homogenous, add in the flour mixture and buttermilk. Alternate them, to make sure all is incorporated without crumbles.
- Finally, stir in the rainbow sprinkles and slowly incorporate them.
- Pour the cake batter into the cake pans, dividing it. Bake for about 30-35 minutes. The time might vary, so check the cake constantly.
Colored Cake:
Ingredients:
- 1 ½ cups unsalted butter
- 3 ¾ cups all-purpose flour
- 1 tsp. baking powder
- 1 tsp. baking soda
- Pinch of salt
- 2 ¼ cups of sugar
- 3 eggs
- 4 ½ egg yolks
- 2 tsp. vanilla extract
- 1 ½ cup buttermilk (low-fat)
- 3 tones of food coloring.
Directions:
- Preheat the oven to 180ºC (350F). Grease three cake pans with butter or vegetable oil. The cake pans must be medium, around 8-by-2 inches. You can adapt to other sizes of cake pan depending on the final design.
- Sift flour, baking powder, baking soda, and salt together. Set aside.
- In another bowl (it must be large) combine sugar and butter, mixing until fluffy. Using a stand mixer gives you a better texture but you can use a whisk as well.
- Slowly add in eggs and yolks, until completely incorporated. Followed by the vanilla extract.
- When all is homogenous, add in the flour mixture and buttermilk. Alternate them, to make sure all is incorporated without crumbles.
- Finally, divide the prepared batter into 3 separate bowls. For each different bowl, you will add a tone of food coloring. Slowly add the color until you get the desired tone.
- Pour the different colors of cake batter into different cake pans. Bake for about 30-35 minutes. Wait for the cake layers to cool down before handling.
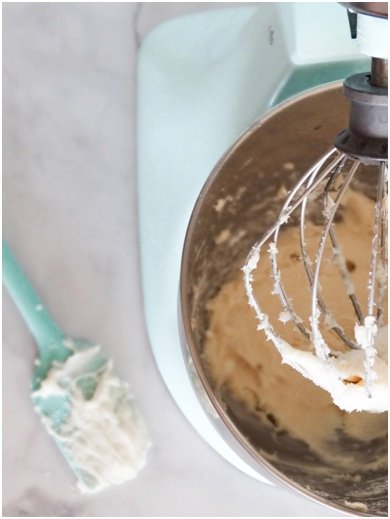
Frosting Recipe: The Buttercream
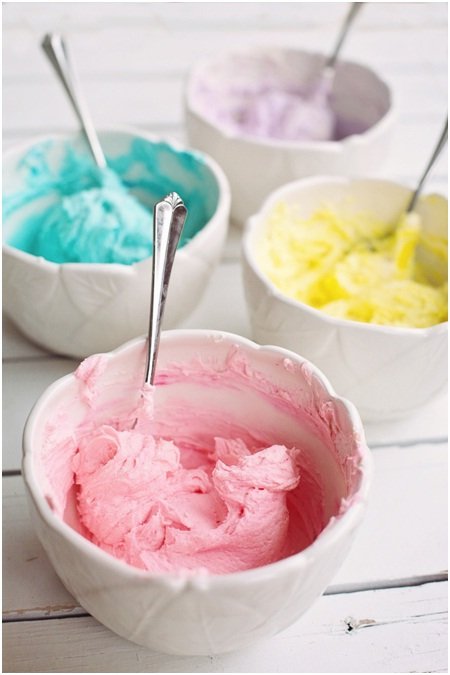
Buttercream is the frosting that will bring your cake together. It’s really easy to make and works perfectly with various designs. The basic recipe is the same but you can turn it into different colors.
Ingredients:
- 1 ⅓ cups unsalted butter
- 4 cups icing sugar
- 4 tbsp. warm water
- 1 tsp. vanilla extract
- Food coloring
Directions:
- Beat the butter until smooth. Then slowly add the sugar, incorporating well.
- Add in vanilla and water. Adjust the amount of water to get a smooth texture.
- Finally, add the food coloring, one drop at a time until the desired tone is reached.
Essentials to assemble the cake:
Before you start baking, have these tools in hands! You don’t need to have all of them, although they will make your life so much easier.
- Round cake decorating turntable
- Rolling pin
- Modeling tools
- Assorted cutters
- Spatulas
- Paring knife
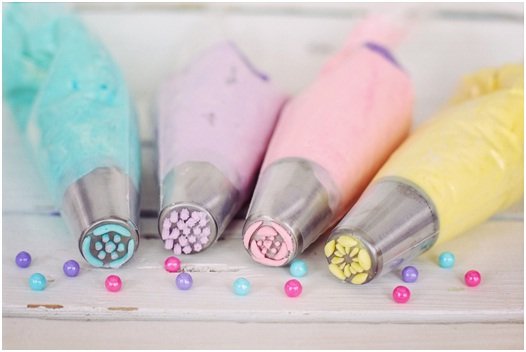
- Pastry bags and piping nozzles
- Many food coloring tones
- Store-bought fondant

Choosing the perfect Baby shark
Now that you have all the basics to make your own cake, it’s time to pick a design. Some cake models are harder to make and others offer less complexity. Here are some amazing Baby Shark cake options, and step by step explanation on how to make each one of the Baby Shark Cake:
Cake #1 – Buttercream with Paper Sharks
Difficulty level: Easy, Time Required: About 2 hours, plus waiting time
Steps:
- Print the Baby Shark Characters in a resistant paper. Print some seaweed details and other desired text or messages. Cut them and put a skewer or straw. These details must be completely removed when serving, for safety reasons.
- Bake one basic cake recipe of your choice. Wait for the cake to cool down.
- Prepare 2 recipes of buttercream. Divide into 2 portions. Add a dark blue food coloring to one of them and a bright tone to the other.
- Place one layer of the cake on top of a round decorating turntable (it’s fine if you don’t have one). Add a layer of buttercream and repeat until all the cake is used. Alternate dark and bright blue.
- Using a spatula, cover the cake with the bright blue buttercream. Go around with the spatula to cover any imperfections.
- Transfer the cake to the serving surface, be extremely careful. You can place it on a big plate or tray.
- Place the dark blue buttercream in a pastry bag with a medium piping nozzle. Go around the cake creating the sea detail.
- Finally, place the paper details carefully.
Cake #2 – Buttercream with Fondant Shark and Seaweed details
Difficulty level: Medium, Time Required: About 2 and a half hours, plus waiting time

Steps:
- Bake one basic cake recipe of your choice. Wait for the cake to cool down.
- While the cake is cooling down, make the fondant details. Divide the fondant into portions and add food coloring to them, kneading until incorporated. Alternatively, you can buy colored fondant. You will need some dark blue, black, green, red, yellow and orange.
- With a rolling pin, open the blue fondant, cut a large circle and small triangles. These will be the shark. Cut some white pieces to make the teeth, black circle for the eyes. Follow the image for reference. Use water to stick the parts together
- For the sea details, follow the same method with the rolling pin. For seaweed, cut small strips and curl them. The fondant modeling tools help a lot to create texture.
- Shells can be made by rolling small balls, making tiny holes and applying a texture with a fondant tool or a fork.
- Prepare 2 recipes of buttercream. Divide into 2 portions. Add bright blue food coloring to one and yellow to the other part.
- Place one layer of the cake on top of the round decorating turntable. Add a layer of yellow buttercream and repeat until all the cake is used (only use the yellow buttercream and save some to write on the cake). Alternate cake and buttercream layers. Remember that the cake outside will be decorated with blue frosting.
- Using a spatula, cover the cake with the bright blue buttercream (save some for the details). Go around with the spatula to cover all imperfections.
- Transfer the cake to the serving surface, be extremely careful. You can use a large plate or tray to serve it.
- Place the blue buttercream in a pastry bag with a medium piping nozzle. Go around the cake creating the sea detail, like waves.
- Finally, place the fondant details carefully.
- Using a pastry bag with a small point piping nozzle, write a message on top of the cake.
Cake #3 – Gradient Blue with Smiling Shark
Difficulty level: Medium to Hard, Time Required: About 3 hours, plus waiting time

Steps:
- Bake one basic cake recipe of your choice. Wait for the cake to cool down.
- While the cake is cooling down, make the fondant details. Divide the fondant into portions and add food coloring to them, kneading until incorporated. Alternatively, you can buy colored fondant. You will need some yellow, white, black, red, orange, green, brown and violet.
- With a rolling pin, open the yellow fondant, cut a large circle and small triangles to form the shark’s body. Cut some white pieces to make the teeth, black and white circles for the eyes, brown semi-circle for the mouth and red for the tongue. Glue the parts using drops of water. Use the cake image as a reference.
- For the sea details, follow the same method with the rolling pin. For seaweed, cut small strips and curl them. The fondant modeling tools help a lot to create texture.
- Shells can be made by rolling small balls, making tiny holes and applying a texture with a fondant tool or a fork. Larger sea details can be made by bringing lots of small balls together.
- Prepare 2 recipes of buttercream. Divide into 2 portions. Add bright blue food coloring to one and a darker tone to the other part.
- Place one layer of the cake on top of the round decorating turntable. Add a layer of buttercream and repeat until all the cake is used Alternate cake and buttercream layers. Use a bit of each color for that.
- Using a spatula, make horizontal layers of the 2 tones of blue buttercream, alternated. This will create a gradient effect. Then use the spatula to smooth the buttercream, covering imperfections.
- Transfer the cake to the serving surface, be extremely careful.
- Finally, place the fondant details carefully.

Luisa Chitolina Schetinger is a culinary expert, food stylist and an amazon published author who lives in Santa Maria, Brazil. She completed her undergraduate degree in Gastronomy and went on to obtain several cooking-related certifications from HarvardX(Science & Cooking), UFCSPA(Culinary) and others. She is the author of "Easy Brazilian Desserts: 10 Recipes Collection", an amazon published cookbook and even participated in a Famous Brazilian Pastry TV Show namely Que Seja Doce. Luisa Schetinger loves writing recipes, cookbooks and she herself is a foodie too.