The durag (sometimes spelled as a do-rag) was a staple of 90s hip-hop fashion, often seen under fitted baseball caps. Since Jay-Z and Cam’ron made them a statement that have inched their way into high fashion, thanks to stars like Rihanna and Solange.
Durags have a long and dark history since they became popular in the 19th century. They were originally used as a way to identify slaves and the lack of wealth, creating a negative stigma to those who wore the hair accessory. The durag became more respected in the 1930s, as the Harlem Renaissance embraced black culture. Although popularized for preserving hairstyles, it became a fashion statement during the Black Power Movement of the 1960s.
Over the past few years, celebrities have put durags back on the fashion map. In 2014, Rihanna wore a Swarovski crystal-encrusted durag to match her dress and then two years later during her VMAs performance of ‘Rude Boy’. At the 2018 Met Gala, Solange interpreted the durag as a heavenly headpiece with the public statement ‘My God wears a durag’. The durag is now no longer a protective headwear piece, it’s a chic high fashion statement that has made its way onto international fashion magazine covers.
Why Should You Wear Durags?

Durags aren’t just a fashion statement. Here are some other reasons why you should be wearing a durag no matter your age, gender or ethnicity.
- It offers compression that will help you get natural waves.
- It will keep your hair moist and protected from natural pollutants.
- Can help protect braids and keep them in place.
- When wearing a durag during the hot summer months, you can protect your hair from the sun’s rays.
- They look amazing when worn alone, under hats, or with accessories like jewels and brooches.
7 Stylish Ways to Tie Your Durag (Do-Rag)
One question that people often ask is how to put on a durag the right way? Well, there is no right or wrong way of wearing or tying one, it all depends on your natural hair and personal tastes.
Although Rihanna wore the now iconic silk durag on the May 2020 cover of vogue, they can also be made of velvet and polyester. So, Play around with different styles and look up tutorials on YouTube. Here are some of our favorite methods.
The Basic Way:

This is the most popular way of wearing a durag and once mastered can be easily done.
- The most important thing is to line up the durag on your head correctly, without this step the finished article will look wrong. Line up the front edges so they rest between your eyebrows and your hairline. Make sure the fabric totally covers your hairline and is lined up with the center of your head, this will stop it looking uneven.
- Now pull the ties back with one on each hand, making sure you tie it behind your ears and not over them. Cross the ties over each other at the back, ensuring they don’t roll up into themselves.
- Once it feels comfortable, wrap them around your head, crossing them over on the middle of your forehead, making sure they stay crossed in the back.
- Make a loop with the tie to the back of your head and tie them securely with a knot. Avoid super tight knots.
- Pull down the flap (which should be on your back) to compress and protect your hair. You can fold the flap however you like, leaving it loose or tucking it in.
360 Curves Durag:

360 waves or curves is a process to train your hair to lay down into a wavy to curly pattern. As your hair naturally grows, it should be trained to lay flat and not grow outwards. Using a durag will help lay your hair down and speed up the 360 process. After every brush you should wear a durag, especially to sleep in. Wearing a durag will protect your waves and hold in the hair’s natural moisture.
- Turn the durag inside out so the seam won’t make any impression or dent. For waves or curves, we recommend silky or poly-satin mixed durags.
- Hold one tail in your hand and wrap them at the back of the head, tails crossing.
- Pull the durag around the head, ensuring they cross the forehead before wrapping around the back again.
- Don’t tie them to avoid lines being left behind. Instead, twist them together.
- Put on a soft headband and tuck the durag under the band. Tuck or roll the flap into the headband to ensure that the durag stays.
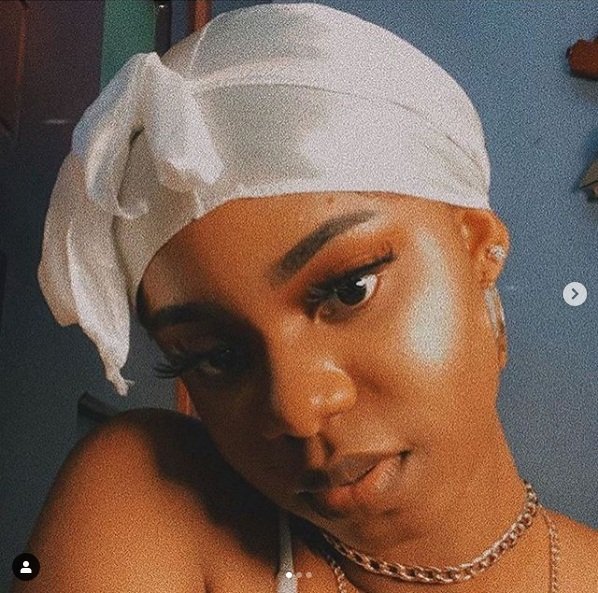
A Bandana Durag:
Durags can also be created using a bandana like this one. As bandanas come in a wide variety of patterns and colors, it is easy to express your personal style and make a bolder statement.
- Hold two opposite corners of a bandana and fold it in half. This will create a triangle shape.
- Place the folded part of the bandana against your forehead, not letting go of the other two corners.
- Pull the two corners tightly around your head, meeting in the back and overlap the third corner.
- Tie the two corners together, tight enough to not come undone but not too tight.
Durag Bun:
The durag bun is an elegant take on the classic durag style, with a bun like shape on the back of the head. We don’t recommend you sleep in this as the back bun may be uncomfortable.
- Place your durag firmly and evenly on your head.
- Cross the wrap in the back of your head and tug it firmly, but not too tight.
- Free the left side and wrap the right side around the left to make a bun.
- Tuck the right side inside the bun.
- Wrap the left side around the bun and tuck it neatly under.
The Quick Durag:
Sometimes there is not enough time to execute the perfect durag, this is why we have discovered the perfect hack for a quick durag.
- Hold the durag in your hands and tie the tails together, using a double knot.
- Now put the durag onto your head, you can place it seam down or seam up.
- Pull the tail loop back behind your head. Turn it over to create a twisting motion.
- Take the flap in one hand and tie it in a knot with your other hand (so it looks like a ponytail).
- Tuck the flap and knot up and into the durag, for additional comfort.
Velvet Durag:
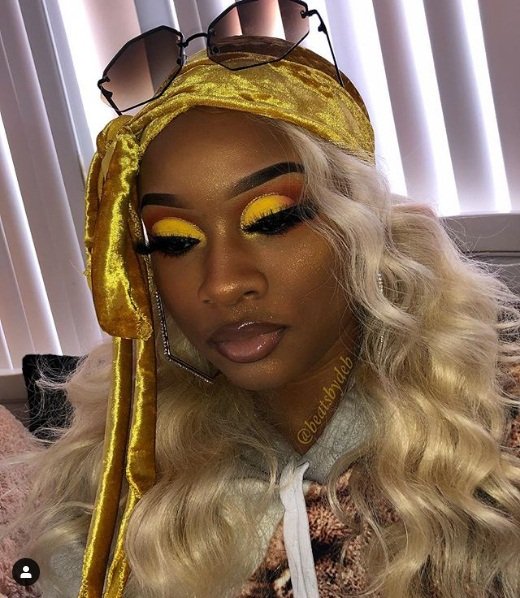
Velvet durags are more durable than satin durags. Whilst they are not as protective as their satin counterparts, they are incredibly stylish and fashion forward. (I personally recommend using only high-quality velvet durags like this one, to look elegant)
- Place the durag on your head. Line up the seam line with the center of your face.
- Pull the strings to ensure the strings lay between your ears and head. Flatten the strings and ensure your ears are left exposed.
- Pull the strings back to the front of your head and then pull them back once more. It’s important they stay flat and not too tight.
- Tie the strings into a knot at the base of the skull.
- The cape will be hanging down but bunched up. Pull it down. This will not only look good, but add compression to your hair.
Front Durag:
Made famous by Ski Mask The Slump God, the front tie durag is the latest in hip hop fashion.
- Place your durag on your head and ensure it’s flat and level.
- Take a string in each hand and hold it behind your head, creating a cross shape.
- Bring one string around your forehead and hook it behind the other ear.
- Bring the other string directly up, so it meets the string behind your ear.
- Tie them together just above your ear, in the same way, you would tie the bag of your durag.
- Tie the back flap up in a knot at the back.
How To Care For Your Durag?
- Avoid sharing your durag with people and wash it regularly.
- Hand wash your durag with mild soap and conditioner. Don’t put it in the washing machine or use a dryer.
- Hang them up instead of keeping them in a drawer to preserve freshness.


Amelia Harvey is a critic and a beauty/lifestyle writer who lives in Bournemouth, U.K. She got her Bachelor of Arts degree from The University of Winchester and went on to work as a content writer at various top publications like Glowsly, Indique, What Culture, ORE, Unkempt, and Flush The Fashion. She is also a Rotten Tomatoes accredited film critic (author at Frame Rated) and also runs Daily Actress, a Tumblr with over 100,000 followers. Amelia loves books and has an incredible knowledge of pop culture, fashion, and celebrity.